Issue
This document provides information on how to extend an existing volume on an SA appliance, and is especially useful in extending data partitions such as metadb, packetdb, sessiondb or indexdb volumes.
Resolution
Configure Virtual Datastores
To configure the virtual datastores:1. Ensure that the newly connected Virtual Datastores are presented as a generic SCSI appliance to the operating system.
2. Configure the following required datastores for a Decoder within the VM:
o PacketDB (Raw Capacity)
o MetaDB
o SessionDB
o IndexDB
3. Ensure that the configured datastores are presented to the virtual Decoder as a SCSI appliance.
Expand the Linux Volumes
To expand & configure the LINUX volumes, execute these steps as root from the command line on the appliance:1. Increase the size of the disk on the Virtual Appliances through ESXi UI, then log on to the virtual machine as root via SSH. The virtual datastores show up as a SCSI appliance. (for example, /dev/sdb, /dev/sdc, and /dev/sdd) and use the following commands:
2. fdisk –l | grep /dev/sd will show the existing partitions on the system.

In the example above, there is 16GB of extra space added to the disc /dev/sdd on the ESXi UI. Its initial size is set to 111.7 GB (/dev/sdc).
3. Assign this extra space to the desired volume group ( VolGroup01) which is actually 104GB.
Run:
fdisk /dev/sdX
...where X is the specific partition to expand. This requires the partition be deleted, then recreated.
As shown in the example below, the /dev/sdd1 partition will be deleted and re-add it back. Once it's re-added, the number of cylinders can be changed to fill the partition with all the remaining available space. Press "p" to print the current partitions.

4. The p artition /dev/sdd1 will be deleted, then recreated. Press d, then select partition 1. In the example above, the partition is self-selected as there is only one partition available on the partition selected, /dev/sdd.

5. Using the n command, the partition will be re-created, then formatted with the proper partition type. In the example above, it will be set up as the primary partition by typing ‘p’. Set the partition number to 1, for the starting cylinder, and subsequently set to whatever was the starting cylinder, noting if this has not changed, the default value may be used by pressing enter when prompted. The default should be used under almost all circumstances. For the end cylinder, also use the default, as this consume the value of the last available cylinder.

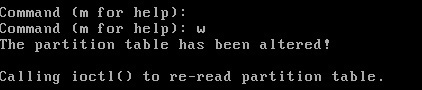
6. Next, change the partition type to LVM (8E) by typing ‘t’ and then ‘8e’. Finally, save and quit with ‘w’.

7. Then device should now be rebooted . After the reboot, use the pvresize command to fill out the partition with the remaining extra space added in first steps. This resizes the amount of space that a LVM volume group can use on a partition, and needs to be run if the partition is resized.
The syntax for this would be:
pvresize /dev/sdXX
Where XX is the partition and it’s number.
Now t he logical volume needs to be resized.
Use: lvresize to execute this.
This will not fill the rest of the volume, but will instruct to assign 100% of the free space to the volume.
In the example shown, the physical volume /dev/sdd1 will be resized and then the Linux volume VolGorup01/metadb:

8. For resizing the desired volume, execute:
# lvresize –l +100%FREE /dev/VolGroup0X/partitionname
...this example specifies that /dev/VolGroup01/metadb is the target linux volume to be resized:
# lvresize –l +100%FREE /dev/VolGroup01/metadb
9. To check the new size for VolGroup01, use the command t
# pvscan
Example:

Notice that the size for this volume has changed from 104GB to 120GB.
10 . Finally, the actual underlying file system needs to be resized.
If the partition is ext4, use the resize2fs command:
resize2fs /dev/VolGroupXX/LogVolXX
Example:
resize2fs /dev/VolGroup01/metadb
11. And then launch the following command since the file system is XFS:
# xfs_growfs /mount/point
See the example below:
# xfs_growfs /dev/VolGroup01/metadb
Remember that while XFS file systems can be grown while mounted, their size cannot be reduced at all.
1. Log on to Security Analytics.
3. In the Services view, select the service, and at the end of the row, click
 > View > Explore
4. Select Database > Config.
5. Select the directory that you want to expand (for example, meta dir, session dir, and so on.).
6. Increase the size of the existing mount:
-Verify that the databases are configured to roll over at approximately 95% of their full capacity.
-If extra space has been added to /var/netwitness/decoder/metadb, and the partition was 104GB, use the following entry under metadb.dir:
/var/netwitness/decoder/metadb=xxx TB
Where XXX will be the new size for the partition, in the example used above it was 120GB.
7. After adding the new extra space to the configuration, run the reconfig file so that the correct size is added.
c. Click Send. The partition sizes will be adjusted to 95% of the partition's available space.
8. Restart the appliance service for the changes to take effect.
Notes
It is advisable to backup the existing volumes if possible before attempting volume extension disk operations. As with any active disk operations, they can cause data loss if not executed properly.
Product Details
RSA Product Set: Security AnalyticsRSA Product/Service Type: Decoder, Log Decoder
RSA Version/Condition: 10.4
Summary
This document details how to expand existing disk volumes on an SA appliance using LVM (logical volume manager.
Approval Reviewer Queue
ASOC Approval Group