Issue
This article outlines the procedure to add email templates to your account in Salesforce. Doing so allows you to apply templates to email sent through Salesforce to automate tasks, such as adding the case number to the email subject.
Resolution
Creating email templates
To add or edit personal email templates, please follow the steps below.- Click the user icon in the top right corner of the Salesforce page and select Setup.

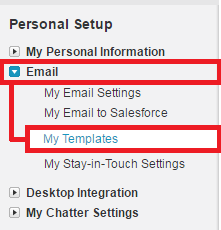
- On the left navigation bar, under Personal Setup, click the arrow next to Email and select My Templates.
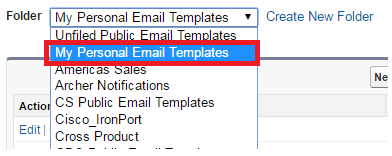
- Click the dropdown arrow for Folder and select My Personal Email Templates (Note: You should only edit and add templates to your My Personal Email Templates folder).
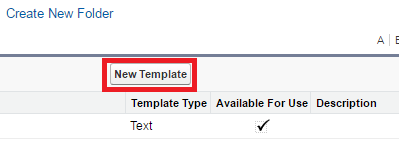
- Click the New Template button.
- Select Text and click Next. Note: The HTML (using Letterhead) and Custom (without using Letterhead) options are only for Salesforce administrative users.

- Under Email Template Information, enter a name for the template. This name enables you identify the correct template when selecting a template from others you create for sending outgoing emails.
- Enter the subject of the email in the Subject text field.
- Enter the content of the email in the Email Body text field. Note that you don’t need to include an email signature if you have already created an email signature in your email settings.

- As in the example above, merge fields can be used to auto-populate case data, such as the Salesforce case number, case subject or the contact's name. Use the merge fields options at the top of the page. Select the correct field type (such as Case Fields) then the field (such as Case.Number, Case.Subject or Contact.FirstName). Selecting the Contact Fields Field Type gives the various fields available under Select Field. Selecting the field shows the format of the merge field value to paste into the email template.

- Check the Available For Use box. If this box is not checked, the template will not be available for selection when writing an email.

- Click Save.
- After saving the template, test and preview the template before using. Select an email template name to view its details and click Send Test and Verify Merge Fields.

- Complete all fields in the Preview box and make sure the Send Email Preview to text field is checked and is populated with your RSA email address. This will ensure you are able to preview the email. Click OK.

- Review the email that is sent and edit your template if needed.
- To edit the template, click Edit on the Text Email Template page and make the appropriate changes,

Notes
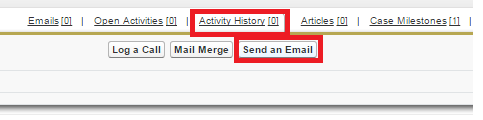
Once you have created your email template you can apply it to email you send from Salesforce.- Hover over Activity History on the case page and select Send an Email.
- Click the Select Template button to the right of the Send button and select the appropriate template from your list of available options:

- The template will display in the email window. Make any necessary edits, attach a file, if needed and click Send.
Product Details
RSA Product Set: AdministrativeSummary
This article outlines how to add email templates in Salesforce to accomplish things like propagate case numbers and descriptions into the subject field.
Approval Reviewer Queue
Other Approval Group