Issue
How to use an RSA NetWitness Platform build stick that was provided by RSA Support?How do I use the build stick that I got from Support?
How do I use the build stick that the Support just sent me for my NetWitness appliance?
What is the build stick procedure for re-imaging a NetWitness appliance?
The "build stick" term is interchangeably also referred to as buildstick or build-stick.
Resolution
Screenshots showing the steps on how to use a RSA NetWitness USB build stick to re-image a NetWitness appliance.- Make sure there is only a minimum number of USB devices connected to the NetWitness appliance.
Preferably just connect the RSA USB build stick and a USB keyboard to the NetWitness appliance.
- Boot the NetWitness appliance with USB build stick connected to a vacant USB port.
- During the NetWitness appliance boot press [F11] for the Boot Manager.

- Enter rsabios for the BIOS Setup Password.

- In the Boot Manager Main Menu, select One-shot BIOS Boot Menu.

- In the Boot Menu, select to boot from the connected USB build stick.

- In USB build stick menu, select to install NetWitness 11.x

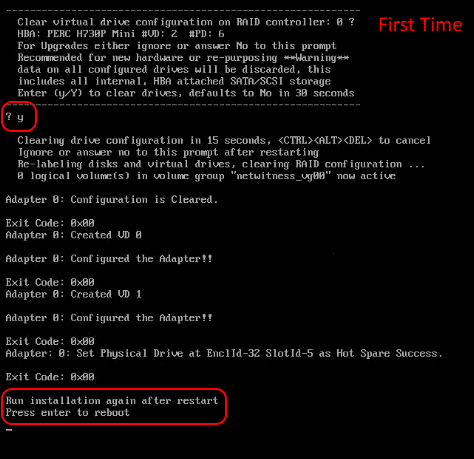
- During the first boot into the USB build stick menu clear the PERC RAID controller configuration, by entering Y to delete any configuration.
Press [Enter] to reboot the NetWitness appliance when the RAID configuration is cleared.
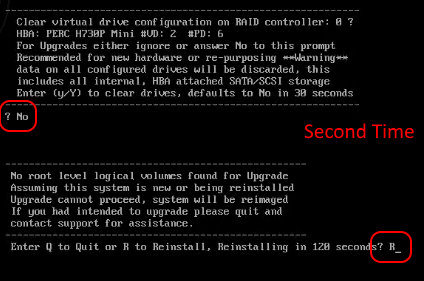
- During the reboot repeat the above Steps 2-7, and skip Step 8.
Instead for the second boot of the NetWitness appliance enter No/N/n to skip clearing the RAID configuration.
At the next enter R to proceed to build a suitable NetWitness RAID configuration and install the NetWitness 11.x software.
- The install process will display, and the NetWitness appliance will reboot when it has completed.
Don't touch the keyboard during the final third reboot of the NetWitness appliance, don't boot from the USB build stick.
Some screenshots of the install progress are provided below.


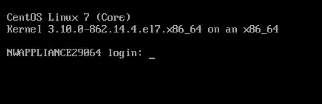
- The re-imaging of the NetWitness appliance with the USB build stick is complete when the appliance presents the NetWitness login screen on the console.
- Remove the USB build stick from the NetWitness appliance.
Notes
Additional References:- To build stick an RSA NetWitness appliance via the Dell iDRAC console refer to RSA KB, How to re-image an RSA Security Analytics appliance via IDRAC
- To create a USB stick refer to RSA online documentation, USB Build Stick Instructions for ISO for RSA NetWitness Platform 11.3 and Later or USB Build Stick Instructions for ISO for RSA NetWitness Platform 11.3 and Later
- To use a buildstick refer to RSA online documentation, Physical Host Installation Guide for RSA NetWitness Platform 11.3
- For step-by-step instructions on using a build stick to re-image an RSA NetWitness 10.x appliance, click here.
Internal Comments
UserName:saxonj4/18/2014 8:04:11 PM - Upgraded Screen Captures needed.
The screen captures are okay but it would be better if we could capture from an iDRAC session, and show how to rebuild an S4s appliance including each step in the process. The problem is, our KB incentives do not provide any incentive for improving existing solutions so this is likely to take lower priority than writing new solutions.
UserName:saxonj
4/18/2014 8:07:10 PM - Added search terms in a "symptom" field
Added several search terms in a "symptom" field to improve searching. Also added to Netwitness partition.
UserName:shurtj
5/2/2014 10:35:59 PM - Modified Article
Modified statements to adhere to Primus best practices and updated the URL so that the link can be accessed through the Primus interface as well as through SCOL.
UserName:shurtj
6/9/2014 2:34:05 PM - Modified Title
Modified title to include "RSA Security Analytics" and modified the related Goal statements.
Product Details
RSA Product Set: NetWitness PlatformRSA Product/Service Type: NetWitness Core appliance
RSA Version/Condition: 11.x
Summary
How to use the RSA NetWitness build-stick?
Approval Reviewer Queue
RSA NetWitness Suite Approval Queue